Instagram ♥

Showing posts with label Hair Tutorial. Show all posts

Thursday, February 21, 2013

Mermaid Curls Without Heat Tutorial & How To Style It.

Hello peeps, miss me? :D Haha, I've been wondering what to blog because life has been pretty dull so far. Staying at home, just practise and online all day long. 

So to spice up my blog, I decided to try out mermaid curls for today! :) I'm going to teach you guys how to have beautiful mermaid curls without any help from hair curler/perm tool! It will not damage your hair and is super easy to do. The outcome is really pretty too! :)


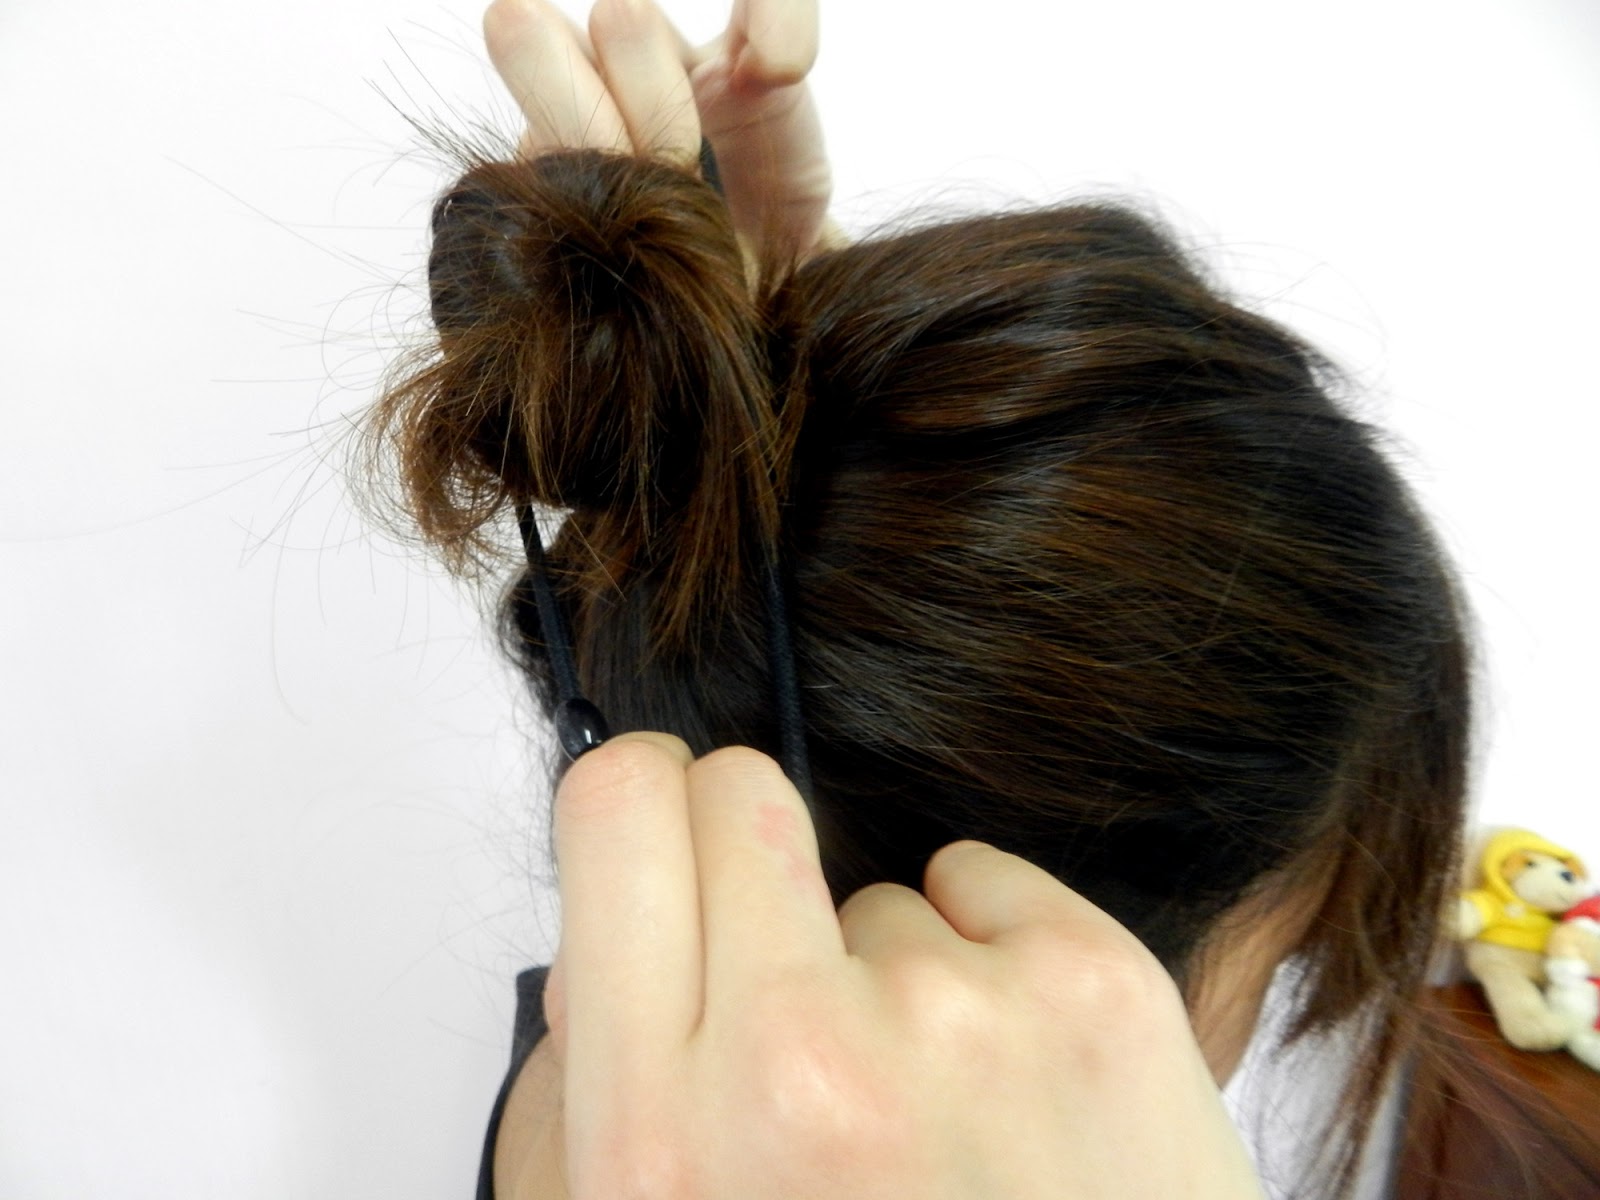
Part your hair into six parts. Take up one part of your hair and start twirling it. Keep twirling it until the end and twirl it into a small bun like what you see in the picture below. Secure it with a pin. 

Do the same to the other 5 parts. You can use hair-bands if your hair is too thick to be secured with pins!


You'll get something like this.


After 1 hour, you can release the pins and let down your curls. It will look something like this. (pic below)

For better effects, you can sleep with the curls pinned for the whole night, and only let down the curls the next day, the curls will last longer! :)


Use your fingers to fluff out the curls so your hair becomes fluffy like this. You can use some hair gels to keep the curls in shape. :)


 I'm really happy with the outcome! Mermaid curls are really romantic. :) This is the effect after I pinned the twirled hair up for 1 hour. :)


Now let's try to do different hairstyles using the mermaid curls! :)
First up, the simple half-up! :) This look is super sweet and good to go for some girly day out with your girlfriends or some romantic dinners with bf. :)


For something more elegant. I styled my hair into a loose elegant bun. This is a much more formal look. :)


It is super easy to do, I just improvise it on the spot. LOL. Twirl the lower part of the hair and hide the extra hair underneath and pin it up! :) Pull some hair out to create the messy feel. Tadaa!


Then for something more sultry and sexy, try to flip two-third of your hair to one side like this. :)
This is a more sophisticated look. :)


My current FB profile pic. LOL. :)


Hope you guys enjoy this tutorial! Have fun trying! :)


Saturday, February 2, 2013

Hair Tutorial: Braid Headband DIY! :)

Hello dearies! Today I gonna do a tutorial to teach you guys how to make your very own braid headband with your own hair! :) It's a very pretty hairstyle that is really sweet and demure! :) The best thing is, it's very easy too! :)


First, part your hair into half like this, and secure it with a elastic band.


Then, take out a portion of hair BEHIND and ABOVE your ear. As for how big is the portion, it depends on how wide you want your braid to be. :)


Braid it into a tight pretty braid and try your best to braid it to the very END of the hair because the braid needs to be long enough to cross over your head to the other side!


After that take the braid and cross over to the opposite side like this!


Secure it with 2 bobby pins! :) Make sure the bobby pins go criss-cross so the braid wouldn't go loose!


Then you can put down the part of your hair which you have tied up earlier! The hair will cover up the bobby pins and make it look like a real headband! :D


Tadaa!!!! :D Super nice right? :D This is my current favourite hairstyle!


Another way to wear this hairstyle is to tie up half of your hair after you've done the cross-over part.
You'll get something like this!


Check out the side! really pretty! :)))))))


Btw, you can also make 2 braids, one from each side and cross both of them over, so you'll have 2 braids over your head! :) Get what I mean? :) That'll be really pretty too! 

^o^ Hope this tutorial is useful! :) Happy trying!


Hair Tutorial: Korean Bun! :)

Hi peeps! My darling Sean came to visit me today and she brought her awesome Nikon Semi D! :) So I asked her to help me to take some pictures to do this Korean Bun tutorial! :)

It's super easy and only take like 3 minutes altogether. :) Hope you guys will like this tutorial! 


The BEFORE hair. :)


Separate your hair into 3 parts. 
Take out the first part like this.


Pull the hair straight up and tease it with your comb. It will create more volume for the hairstyle.


After teasing, put the hair down in front.


To the same to the 2nd and 3rd part of your hair, keep teasing!


It will become something like this in the end.


Then gather all your hair into a ponytail.
You can decide how high you want the ponytail to be, it is where the bun will end up as.
I usually like it to be higher, because it's cuter that way! :)
Notice how it has the puffed-up effect? :) This is perfect for those girls who don't have enough hair volume, like me! :)


Then start twisting your hair into a bun! :)

*cover the awkward space in my hair with a bowl of cute ramen hehe*


Here's the bun!


 Take a black elastic band and tighten it around the bun! :)


Done! Tadaa!!!! :)


Super easy right? :) You can pull out a few strands of your hair to create a messier look. Korean bun looks better when it's messier! :)


Will update another hair tutorial tomorrow! :) Stay tuned!